Building HTML5 display ads with Adobe Animate
Adobe Animate Version 19.2
Adobe Animate. It’s a great tool with lots of potential. Ultimately it’s Flash but with a decent handle on exporting your animations in HTML5 format, which I think is excellent. This is a tool that can be wrangled just as well as Flash to provide a rich animation authoring environment. The kicker? It takes some configuration to get it all set up properly. Ad networks have some reasonably strict guidelines to comply with, but it’s all manageable. Follow along. I’m going to assume you have a handle on animation already. This guide will cover setting up the environment, images, publishing template, and a few tricks to help out along the way.
That size constraint though…
– Every ad designer ever
Ultimately our biggest hurdle is often going to be file size. Most ad networks require their standard programmatic display ads to be under 100kb once zipped. This can be a tough goal to meet and will turn many designers towards alternative solutions. I assure you, with some foresight and tweaking, this is attainable. You can even cram it full of animation if you want, not that you should.
The importance of templates
Building a good series of templates for your various ad sizes is crucial to reproducing this if you plan on authoring these ads regularly. You need a starting point for every project with some of your key features already in place so that you don’t have to duplicate those steps every time. I’ll show you my process and talk you through the difficulties of building a template. You can download the template at the bottom as well if you’d like.
Folder structure
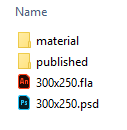
Planning and maintaining a directory structure for your files is going to help you stay organized, and will be important to publishing the finished ad. I recommend the following: Create a folder for your project. I’ll refer to this as the root folder. Inside of your root folder you will save your layout file (.xd, .psd, etc.), your Animate file (.fla), as well as a new folder called published which will house the final ad files, and usually an additional folder for your source assets (like stock imagery, logos, etc.), I called mine material.
Layout
I’ll often lay out my ads using Photoshop, and then export my assets from there. I find that if you build your design elements inside of Animate itself, it will often result in too large a file size. If it’s all flat and simple, you might get away with it, but if you have any depth or use effects, it adds too much code to the html file, resulting in too large a file. Even a heavy majority of my text is exported as images from Photoshop. I don’t rely on web fonts, I find they’re just too large for this use case.
So, start with laying out your ad in your design software of choice.

Images, everywhere
Next you’re going to want to export your assets. Everything with a transparent background should be trimmed (excess empty space cut out) and exported as a .png (24 bit). For everything else, you’ll want to first determine how complex the asset is. If it is only a handful of colours, export it as a .png, but if it has a wide array of different colours (like any photograph), export it as a .jpg. I use a quality of 60 when exporting .jpgs, as this appears to be a good middle ground between quality and file size. You can squeeze out a lot of room by adjusting the quality of your .jpgs in Photoshop, so if you’re in a pinch you can sacrifice image quality to meet the file size restriction. In this example all of my text and my CTA (advertiser speak for button) are exported as .pngs, and my full pink background image with the banana is a .jpg.

Image compression
So important that it deserved it’s own heading. Adequate image compression is key to this process. There are no shortage of ways to accomplish this, but I use TinyPNG for now. There’s a paid photoshop plugin or a free website (https://tinypng.com/) that you can use to accomplish this. It’s pretty much magic, but the result is often an image at half the file size of the original with a negligible visual difference. In this example, I was able to compress my assets to 47% of their original size. I love this tool. Compress every image asset that you export. Now your images are way lighter, which will go a long way in keeping your overall ad size down.
Save these images into the published folder you created earlier. They’re going to be used as the source images for our published ad next.
Publish Settings
Before we get onto building the ad, it will be important to make sure our Publish Settings are specified correctly, partially because this allows us to preview our animations properly. So start by creating a new HTML5 Canvas file in Animate. I’ll use a 300 X 250 pixel sized canvas to match my design, and a frame rate of 24. Save the file into your root directory. Now click File > Publish Settings. This part is important.
Basic Tab
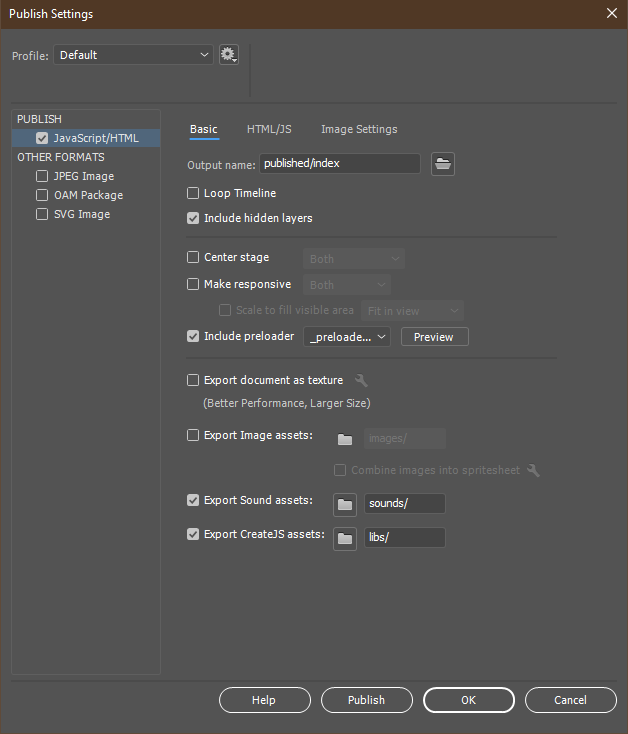
- Output name is where we specify the location of the published ad. This will be the published folder from earlier. Set this value to published/index. This tells Animate to publish an html file called index.html in the published folder. Now copy or move the optimized images into the published folder.
- Loop Timeline should be disabled. Enabling this would create an ad that loops indefinitely, which is against the time limit specifications of ad networks. I’ll show you how to add your own looping code a bit further below.
- Include hidden layers is enabled for me. This helps ensure I catch my clickTag element in my published files. I’ll speak more to that coming up.
- Center stage and Make responsive are both up to you based on the type of ad you’re building. I tend to leave these both off as I am building ads for specific sizes.
- Include preloader is good to enable as it ensures the ad elements have all been loaded before commencing, which prevents animation issues. I use a very lightweight preloader downloaded from http://www.ajaxload.info/
- Export document as texture is definitely disabled.
- Export Image assets is also disabled. TingPNG seems to do a better job of compression than Animate does, so we’ll maintain control of our images manually.
- Additionally, you’ll want to click the little folder icon beside this setting to grey out the box beside it. This will ensure that the ad is looking for the images in the published folder, instead of the published/images folder. Some ad networks don’t allow folders inside of your ad, so it is important to keep everything at the main level.
- You’ll also want to ensure that Combine images into spreadsheet is disabled.
HTML/JS Tab
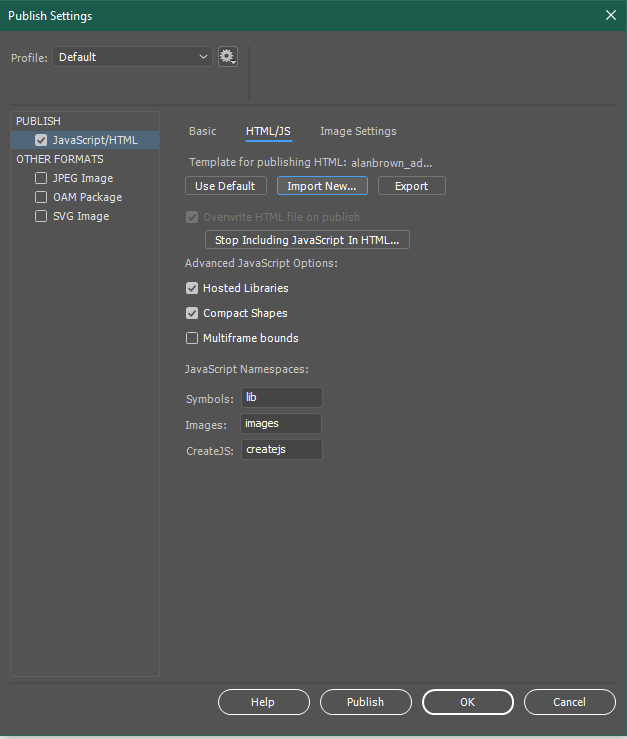
- Template for publishing is an important item for us. In order for the ads to work properly with the ad networks, you’ll need define the HTML environment the ad is loaded into using a publishing template. I use a publishing template that I have modified based on Cory Hudson’s 2016 AdHelper template. This also handles the clickTag variable for your clickthrough URL. The template is below. Save this as an html file. Then click the Import New button in the publish settings and choose this html file.
<!DOCTYPE html>
<!--
	NOTES:
	1. All tokens are represented by '$' sign in the template.
	2. You can write your code only wherever mentioned.
	3. All occurrences of existing tokens will be replaced by their appropriate values.
	4. Blank lines will be removed automatically.
	5. Remove unnecessary comments before creating your template.
-->

<html>
<head>
<meta charset="UTF-8">
<meta name="authoring-tool" content="$VERSION">
<title>$TITLE</title>
<!-- write your code here -->
$CENTER_STYLE
$CREATEJS_LIBRARY_SCRIPTS
$ANIMATE_CC_SCRIPTS
$SCRIPT_START
var canvas, stage, exportRoot, anim_container, dom_overlay_container, fnStartAnimation;
function init() {
	canvas = document.getElementById("$CANVAS_ID");
	anim_container = document.getElementById("$ANIM_CONTAINER_ID");
	dom_overlay_container = document.getElementById("dom_overlay_container");
	$CREATE_LOADER
	$LOAD_MANIFEST
	$PRELOAD_ASSETS
}
$HANDLE_FILE_LOAD_START
	$HANDLE_FILE_LOAD_BODY
$HANDLE_FILE_LOAD_END
$HANDLE_COMPLETE_START
	//This function is always called, irrespective of the content. You can use the variable "stage" after it is created in token create_stage.
	$CREATE_STAGE
	//Registers the "tick" event listener.
	$START_ANIMATION
	//Code to support hidpi screens and responsive scaling.
	$RESP_HIDPI
$HANDLE_COMPLETE_END
$PLAYSOUND
$SCRIPT_END
<!-- write your code here -->
<script>var clickTag = "https://alanbrown.ca";</script>
</head>
<body onload="init();" style="margin:0px; cursor:pointer;">
	<div id="$ANIM_CONTAINER_ID" style="background-color:$BG; width:$WTpx; height:$HTpx;">
		<canvas id="$CANVAS_ID" width="$WT" height="$HT" style="position: absolute; display: $CANVAS_DISP; background-color:$BG;"></canvas>
		<div id="dom_overlay_container" style="pointer-events:none; overflow:hidden; width:$WTpx; height:$HTpx; position: absolute; left: 0px; top: 0px; display: $CANVAS_DISP;">
		</div>
	</div>
    $PRELOADER_DIV
</body>
</html>- Overwrite HTML file on publish should be enabled, and then click the button that says Include Javascript in HTML. This will change the button text to say Stop Including Javascript in HTML. This just packages the javascript inside of the html. Some ad networks don’t allow any files apart from the html and the images, so this prevents any pushback around an additional javascript file.
- Advanced JavaScript Options I’m not entirely clear on but those default settings seem to work fine!
Image Settings Tab
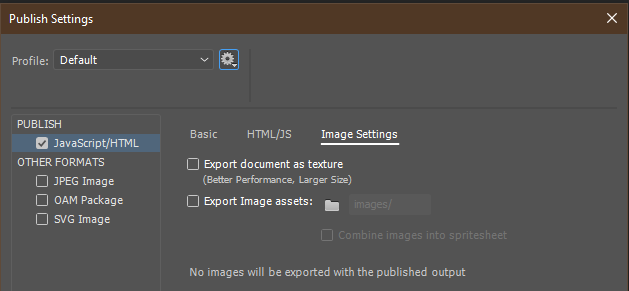
This one’s easy. Everything should be disabled. Get out of my way, Animate.
Building the display ad in Animate
Import all of the optimized images into the file (File > Import). Lay them out as you had in your design software. Be sure to split them onto individual layers if you plan on animating. I’d name those layers now as well, to help you out down the line.
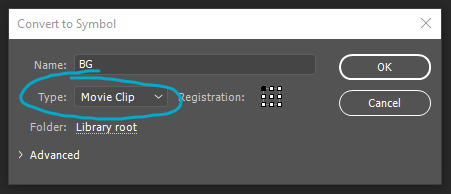
Then convert those items into Symbols (Modify > Convert to Symbol). Note: Ensure that the Type of the Symbol is set to Movie Clip as it’s the most versatile, and those other types could get you in trouble unless you have specific intentions for them.
Now you animate everything. Animation is a whole thing so I won’t cover it here. if you’re just learning I’d suggest familiarizing yourself with the concepts, and taking some of those lynda.com or youtube courses to flesh out the details. One tip I’ll give you is for smooth animation is to use easing on everything that moves.
Animation Looping Code
Be sure to check the specifications for your situation, but most ad networks allow up to 30 seconds of animation. In many cases this can allow your animated ad to loop 2 or 3 times to maximize impact. Looping is easily accomplished with a little bit of javascript.
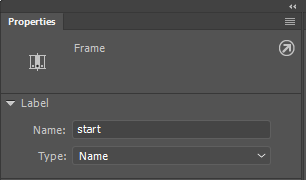
Add a new layer and call it scripts. This just allows us to keep our global javascript visually segregated from animations on the timeline. Select frame 1 of this layer, and give it a Name of start. You can do this in the Properties panel.
Now, select the final frame of your timeline in the actions layer, add a new keyframe (F6), and add the following piece of code to the Actions panel:
var _this = this;

// Stops timeline on X loop or return to start
if (!this.looped) this.looped = 1;
if (this.looped++ == 2) this.stop();
else _this.gotoAndPlay('start');
This essentially tells the ad to stop when it hits this keyframe on the second instance. Swap that 2 for however many loops are needed, but make sure that the overall time fits within the limitations dictated by your ad network.
ClickTag
The clickTag is the area that the user can click or tap to “click through” the ad to the destination URL. First we’ll define the area with an object in our .fla, then link it up the publishing template with some javascript. The publishing template enables the ad network to specify the URL of the ad as they see fit.
Start by adding a new layer and naming it clickTag. This layer should be on top of any symbols or other elements, as they would otherwise block the clickable area of the ad.
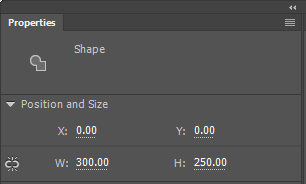
Now draw a Rectangle on your clickTag layer, then position and size it to fill your entire ad canvas, I do this using the Properties panel:
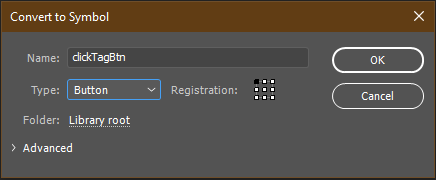
Now you’ll want to convert this rectangle to a Symbol, but this time you will use the Button type:
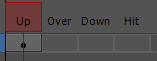
Now double click on your clickTag button to open up the object. This will. change the timeline from the traditional timeline to the button timeline, which instead has 4 distinct frames: Up, Over, Down, and Hit
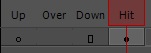
These allow you to define different interaction states for your button. In our case, we only need to use the Hit frame, as we only want our clickTag to exist as a hitbox that the user can click or tap, and not as a visible element. In order to accomplish this, select the rectangle we drew on the Up keyframe, cut it (Ctrl + X), create a new keyframe on the Hit frame (F6), and paste the rectangle there (Ctrl + V). Your keyframes for this button should now look like this, indicating that you only have an object on the Hit frame:
Now, return to the main Scene by either double clicking outside of the stage, or clicking the Scene 1 label in the top left of the stage. This returns us to our main animation timeline, and we should have a transparent blue object on top of our animation. This is our clickTag button. The transparent blue indicates the hitbox area we just defined.
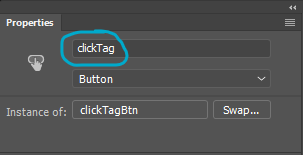
Imporant: Select this Button object and give it an Instance Name of clickTag in the Properties panel. This enables us to reference the object appropriately.
Finally, you’ll want to add the following javascript to frame 1 of your timeline to capture any clicks on your ClickTag:
var _this = this;

/* ClickTagBtn control */
_this.clickTag.on('click', function(){
	window.open(clickTag, "_blank");
});
At this point you should test your ad to ensure the clickTag is functioning properly. Preview the ad and click it, it should open up a new tab with the destination URL in it.
Border
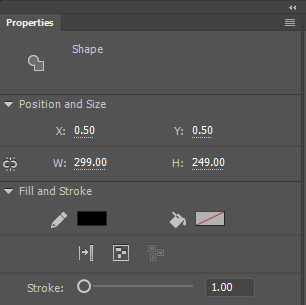
It is crucial to have a border around your creative, as it might otherwise blend into the content or background of the website it’s displayed on. Most ad agencies will reject your creative if there is no border. I simply add a layer below my scripts layer with a 1px black stroked rectangle. I position it at 0.50 on the X and Y axis and make the rectangle one pixel smaller than the creative itself. This positioning is necessary due to how Animate applies strokes.
Preparing files for delivery
Ad networks will ask for the creative in a zipped file, as well as a backup image of the creative, in case the user has javascript disabled.
Start by publishing the ad (File > Publish). This will output all of the ad files into the published folder from earlier. Now navigate to this folder, and run the html file in there to test the creative one last time. Check your animations, your looping, and your clickTag. If everything is working as intended, zip up this folder and name it something obvious, like CampaignName_300x250_Sep19.zip. Now hop back over to your design software and save a static image of the ad, make sure it is less than 40kb. This zip and static image are your deliverables. Fire those over to your client and call it for the day. You’ve done good, kid!
Templates
Here is a copy of the templates created for this example:
Post Comments
Hi Alan
Thank you very much for your tutorial on how to build an ad in Adobe Animate.
I have a question about the HTML 5 Canvas.
I built my ad in animate and then transfered it to a HTML 5 Canvas.
Unfortunately the HTML 5 Canvas does not support effects of layers such as multiplying.
But I need those effects for a client which uses the same look on all different platforms.
Do you know any workaround for that?
Best regards
SN
very good website
Your article saved me, THANK YOU.
This is amazing. Thanks for sharing your knowledge.
I had one issue. When publishing, if I didn’t click export images assets, my images wouldn’t appear in the html. I’m I missing something?
Hey Graham. Tough to say where the issue would be. You should already have saved the images in the
/publishedfolder after you’d optimized them. Your publishedindex.htmlshould also live in the/publishedfolder and should be referencing the images from the root of that folder. Ensuring “Export image assets” is unchecked just prevents Adobe from overwriting those images. Double check that your publish settings are correct and that you’ve imported your images into the Library (File > Import) when building the ad.Hey Alan,
Thanks for your reply. I’ll give it a shot. Thanks again for sharing your knowledge.